Configuring Single Sign-On with Okta
To configure single sign-on with Okta, you need to complete steps in both Okta Admin Console and in the JAMS Web Client. You will need to copy/enter values between both applications, so keep both screens open during this process.
Complete the steps in all sections below to complete the setup.
Before You Begin
-
Ensure you have the appropriate permissions to access the Okta Admin Console.
-
Ensure the Okta domain is synched with the on-premises Active Directory.
-
Copy the URL for your Okta Admin Console and remove the references to admin.
- Example - It will look similar to: https://integrator-12345678.okta.com after you remove the admin references. You will need to enter this URL as the Authority URL in the 2.1 Adding the Okta Identity Provider in the JAMS Web Client section.
1. Okta Application Configuration
1.1 Creating the OIDC Application in the Okta Admin Console
- Go to the Okta Admin Console.
- Go to Applications | Applications | Create App Integration.
- Select OIDC - OpenID Connect for the sign-in method.
- Select Web Application as the application type.
- Click Next.
- Configure the application as listed below.
- Ensure you note the <scheme> value that you choose as you need this exact value in the 2.1 Adding the Okta Identity Provider in the JAMS Web Client section.
- Click Save.
| Field | Value |
|---|---|
| App integration name | JAMS Web (or another preferred name) |
| Grant type | Authorization Code |
| Sign-in redirect URIs | https://<JAMS-gateway>/signin/<scheme> If your JAMS Gateway address is https://jams.example.com, the redirect URI would be: https://jams.example.com/signin/okta_oidc. If you are using https://localhost/signin/okta_oidc, ensure you do not include port 443. Important: The <scheme> must match what you will use in JAMS Web Client Identity Provider setup. Make sure you copy this value. |
| Sign-out redirect URI | Leave blank or keep default. |
| Controlled access | Select the access level, such as Allow everyone in your organization or restrict to specific groups. |
1.2 Copying the OIDC Client ID and Client Secret
- From the General tab, copy the following as you need these in the 2.1 Adding the Okta Identity Provider in the JAMS Web Client section.
-
Client ID
- Example:
12345678901234567890 - This is your OIDC Client ID.
- Example:
-
Client Secret
- Example:
1234a~5678B901234c5678d901234e5~67890123 - This is your OIDC Client Secret.
- Example:
1.3 Creating the API Services Application (Management API Access)
JAMS requires a separate API Services application to look up user and group information from Okta.
- Go to Applications | Applications | Create App Integration.
- Select API Services and click Next.
- In the App integration name field, enter JAMS Management API.
- Click Save.
1.4 Copying the JAMS Management API Client ID
- On the same screen, copy the Client ID. You will need this in the 2.1 Adding the Okta Identity Provider in the JAMS Web Client section.
- Example:
00123456789abcdefghi - This is your JAMS Management Client ID.
1.5 Disabling DPoP on the JAMS Management API Application
- Scroll down to the General Settings and then click Edit.
- Clear the checkbox for the Require Demonstrating Proof of Possession (DPoP) header in token requests.
The JAMS Web Client does not implement DPoP. If you leave this enabled, Okta token requests from the JAMS Web Client will fail. - Click Save.
1.6 Granting Management API Scopes to the API Services Application
- Go to Applications | Applications.
- Click the JAMS Management API.
- Click the Okta API Scopes tab.
- Grant the okta.users.read and okta.groups.read options.
- Go to the Admin Roles tab.
- Click Edit assignments.
- Add Read-only Administrator and save your changes.
- Keep the Okta Admin Console open because you will need to return and add a public key from the JAMS Web Client. You may be prompted for a validation code.
2. JAMS Web Client Configuration
2.1 Adding the Okta Identity Provider in the JAMS Web Client
Before You Begin
You need the following information before starting this section:
- The Authority URL from Before You Begin.
- The scheme name, such as okta_oidc, from 1.1 Creating an OIDC Application in the Okta Admin Console.
- The OIDC Client ID for the JAMS Web application from 1.2 Copying the OIDC Client ID and Client Secret..
- The OIDC Client Secret 1.2 Copying the OIDC Client ID and Client Secret.
- The JAMS Management Client ID for the JAMS Management API application from 1.4 Copying the JAMS Management API Client ID.
After you have configured the two applications in Okta Admin Console, you can add the Identity Provider in the JAMS Web Client. You will need to access the Okta Admin Console again in one step below.
- Click Access from the main menu.
- Click Identity Providers.
- Click Add.
- In the Provider field, select Okta via OpenID Connect.
- In the Scheme field, enter the scheme name for this Identity Provider, such as okta_oidc.
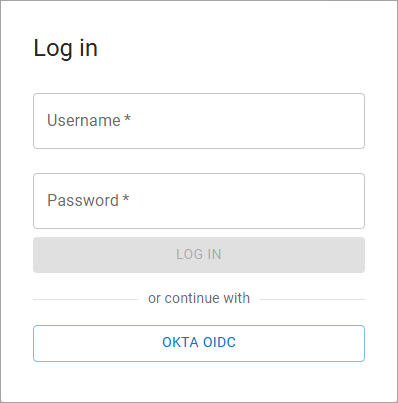
- In the Display Name field, enter the text that you want displayed as the button text on the JAMS Web Client Log in screen. For example, you can enter Okta OIDC.
- Click Save and Continue to Edit.
- In the Authority field, enter the Authority URL.
Example: https://integrator-12345678.okta.com - In the Client ID field, enter the OIDC Client ID that you previously saved for the JAMS Web application.
Example:12345678901234567890 - Click Save.
- Click Change to enter the OIDC Client Secret.
- In the New Client Secret and Reenter Client Secret fields, enter the OIDC Client Secret value.
Example:1234a~5678B901234c5678d901234e5~67890123 - Click Save on the Change Client Secret box.
- Under the Directory Sync section, go to the Management Client ID field.
- Enter the JAMS Management Client ID that you previously saved for the JAMS Management API application.
Example:00123456789abcdefghi - Click Save.
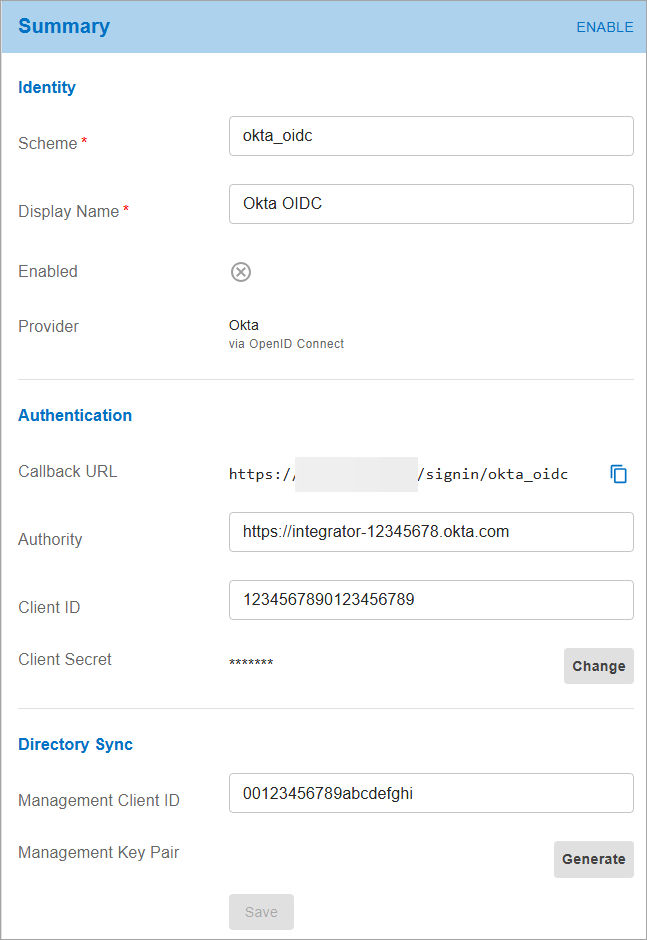
- Next to the Management Key Pair, click Generate.
- In the Generate Management Key Pair dialog box, click Generate to create a public JWK key to use in the Okta Admin application.
This key is shown only once, so ensure you save it.
- Copy the key and then click Done. Keep this page open in the JAMS Web Client as additional configuration is needed here.
2.2 Registering the Public Key in Okta
This step briefly returns you to the Okta Admin Console to register the public JWK key you just generated in the JAMS Web Client.
- Go back to the Okta Admin Console.
- Go to Applications | Applications | JAMS Management API.
- Click the General tab.
- Scroll down to the Public keys section.
- Click Edit.
- Click Add key and then paste the JWK key from the JAMS Web Client.
- Click Done.
- Click Save.
- On the same screen, scroll up to the Client Credentials section.
- Click Edit.
- Change the Client authentication option to Public key / Private key.
- Click Save.
2.3 Enabling the Okta Identity Provider in the JAMS Web Client
To use this Identity Provider to log in to the JAMS Web Client, you need to enable it.
- Go back to the JAMS Web Client and view the Okta Identity Provider screen.
- To use this new Identity Provider, click ENABLE in the top right corner of the Summary table.
A message is displayed prompting you to restart the Identity Service for this change to take effect. When an Identity Provider is enabled, the JAMS Web Client makes the input fields read-only and activates the Identity Provider. To edit it again, the Identity Provider must be disabled. - Log out of the JAMS Web Client.
- Open the Windows Services manager.
- Right-click the JAMS Identity service and select Restart.
- Go to the JAMS Web Client Log in screen.
- Click the button to sign in with Okta and follow any additional prompts.