History
The History screen provides detailed information for all Job executions that have completed in the Monitor. For each Job, you can review its run history, duration, the Agent it ran on, and whether it completed successfully or resulted in a failure.
You can also:
- Submit a Job to run in the Monitor.
- View the Properties of an Entry.
- View the execution details and log file of an Entry to get more information for troubleshooting.
- Query and filter the listed Entries based on your preferences.
Maintaining the History
By default, a JAMS runs the JAMSPurgeHistory Job in the JAMS folder to clean up and remove history entries older than 30 days from the JAMS database. The Job runs on Sundays at 2:00 AM. It has three Parameters that you can modify:
- MINROWS - The minimum number of rows per Job to keep. This ensures you always have the most recent record of a Job. The default is 1.
- MAXROWS - The maximum number of rows per Job to keep. The default is 30.
- DAYS - The maximum number of days of history to keep. The default is 30.
You may want to adjust the values if a Job is running multiple times a day or if you have a high-volume environment. For example, if you have a Job running 3 times a day and you want 30 days of data, you need to update the MAXROWS to 90. (Number of times the Jobs runs per day multiplied by the required days.)
Accessing the History screen
- Click History from the main menu.
- View the list of Job Entries.
History screen
The History screen lets you the details of each completed Entry, including the following information:
- Entry ID – The number assigned to the Job in the Monitor.
- Status –The final state of the Job. See Monitor for a table listing the various status icons.
- Name – The name of the Job.
- Final Severity – The severity level of the Job.
- Scheduled Time UTC – The time the Job is scheduled to start to run in UTC.
- Hold Time UTC – The time when the Job will be released to run.
- Start Time UTC – The time the Job started to run.
- Completion Time UTC – The time the Job finished running.
- Execute As Name – The Credential that is used to run the Job.
- Executing Agent Name – The name of the Agent where the Job.
Viewing the Properties of an Entry
You can view the Properties on the Job Definition for a selected Entry. This includes the Job Source, Schedule Items, Properties, Parameters, and any permissions.
- From the History screen, click an Entry from the list.
- Click Properties.
- View the contents of the tabs. You can make edits and save them directly to the Job Definition.
- Click Save to save any edits.
Viewing the Execution Details and Log File of an Entry
You can view the log file for an Entry in the History. This is helpful if you want to see any details from the last run of the Job. You can also view the Properties, Parameters, and Schedule Items that were used when the Job ran. The values are read-only.
- From the History screen, click an Entry from the list.
- Click Show Detail.
- On the Summary tab, view the Submitted By name, Agent, Final Status, and Completion Severity.
- Click the Log File tab to view the execution log for the Entry.
- Click the Properties tab to view the properties used to run the Job.
- Click the Parameters tab to view the Parameters that were used.
- Click the Schedules tab to view the Schedule items used to submit/run the Job.
Manually Submitting a Job to Run
You can manually submit a Job to run from the History screen. See Manually Submitting Jobs for more information.
Querying and Filtering the History
If your site runs many Jobs, the History can have many Entries. To help you find the Entries that you want based on Job criteria, you can use Queries. There are two options for filtering the Entry Information:
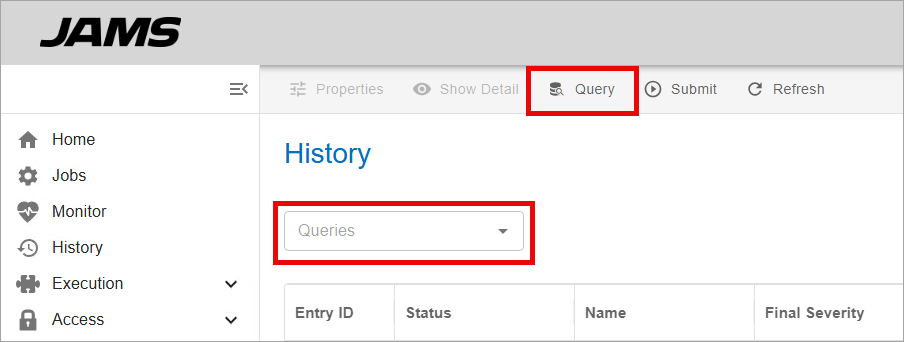
- The Query button – This option lets you filter by the Job name.
- The Queries drop-down menu – This option lets you select a predefined Filter by Job/Entry status, Entry number, name, date range, past window, or the Agent that ran the Job. These Queries are configured in the Query Management menu.
Querying for Jobs by Name
You can search for Jobs that are listed in the History. The Query option lets you use a wildcard character to search for Jobs with a specified name.
- Open the History.
- Click Query.
- Enter the name of the Job that you want to find. By default, the * character is displayed in the field.
- Click OK. The History is updated with the search results.
Using Queries to Filter the History
You can use predefined Queries to help filter the information that is displayed. If you select a Query, it applies to only your user account. If other users log in, they can choose their own Query to use.
- From the History screen.
- Click the Queries drop-down and select a Query. The History is updated with the search results.
Clearing a Query
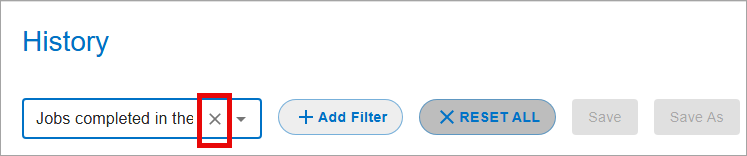
if you want to reset the History view, you can clear the Query by clicking in the drop-down menu and clicking the X next to its name. You can also use the RESET ALL option to reset all unsaved changes in the selected Query.
Updating a Query in the History
After you apply a Query to the History view, you can make additional adjustments to the Filters within that Query. You can then save the changes to the existing Query or save it to a new Query. If your account does not have Execute and Inquire Access, the changes will not be saved.
To add a Filter to the Query:
- Select the Query from the drop-down menu.
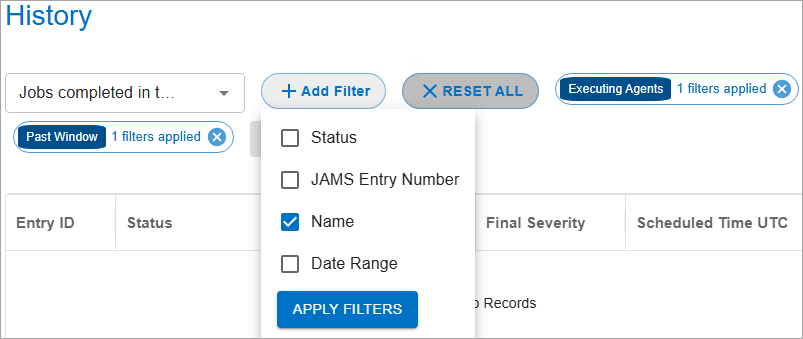
- Click + Add Filter.
- Select a new Filter from the drop-down menu.
- Click APPLY FILTERS.
- Click the new Filter tile to add a value.
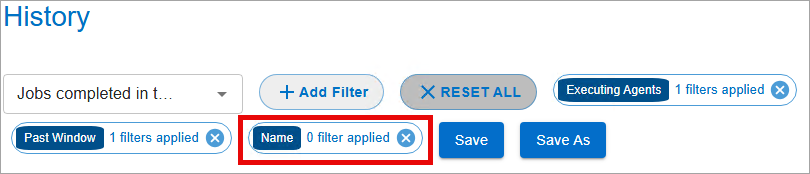
- Add the value.
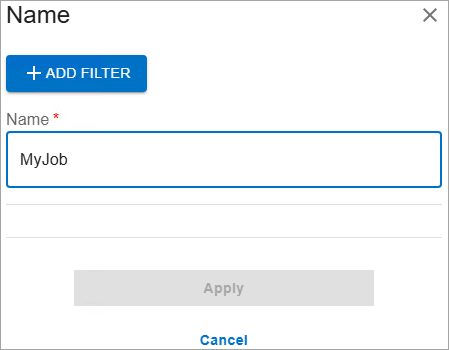
- Click + ADD FILTER.
- Click Apply.
- Click Save or Save As to save changes as another Query.
To update a Filter value in a Query:
- Select the Query from the drop-down menu.
- Click the Filter tile.
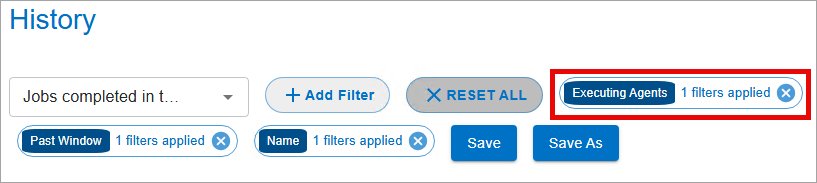
- To remove the value, click the X next to it and then click Apply.
- To update the filter, select a new value.
- Click + ADD FILTER.
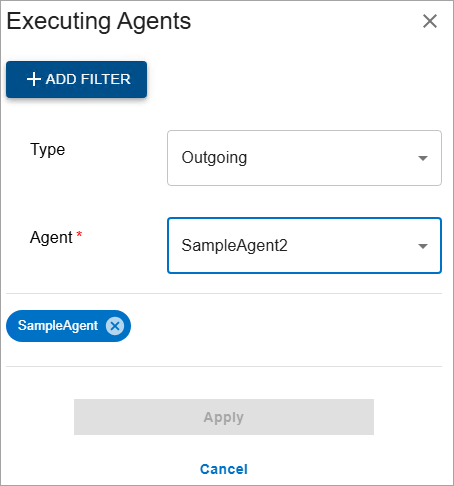
- Click Apply.
- Click Save.